
Drawing a palm leaf
Drawing a Palm leaf only with 6 simple tasks! There are not many trees that combine luxury and style with palm trees. You may also learn many things cartoon drawing, scary drawing, cartoon drawing, cute drawing, flowers drawing, cute drawing, puppy drawing, draw supeman and dog drawing. These trees are a typical sight in many colorful places, so they are often taken as a sign of relaxation and relaxation! Even the palm leaf has come to represent similar things, and, surprisingly, even more so because Cleopatra uses it in different films and media.
These leaves are also very colorful and fascinating in their design, so it is known that everyone tries to draw the shape of a palm leaf. If you’re thinking of drawing a popular leaf, you’ve come to the sweet spot! Our step-by-step guide on the most effective way to draw a palm leaf in 6 simple steps will show how fun and easy it can be! Mainly to draw a palm leaf in 6 steps.
Step-by-step instructions for drawing a palm leaf – We roll everything! 1 step
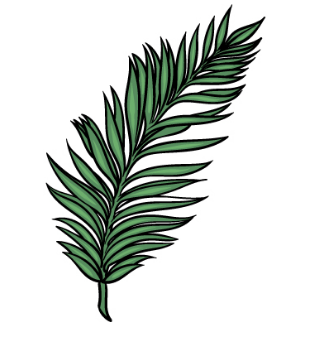
instructions for drawing a palm leaf Step 1 Now look at the leaf of a palm tree; you will see that it is composed of clusters of independent leaves in a huge isolated branch, which can start to be quite difficult to draw! So we will dwell on the most effective method of drawing a palm leaf and separate it into smaller developments. First, draw a thin strip with a sharp tip at the branch’s root. Then we will begin to pull some leaves from this branch. Each leaf will be drawn using a few suitable lines to compose these slimmer forms. Each will also have a sharp end, as shown in our image. Then you can jump to step 2 of this help!
Step 2 – Currently draw several lines of the leaf
especially to draw a palm leaf level 2. You drew the first few leaves of this palm leaf in the first step, and now we’ll draw the next few. It may not be as simple as expected, so the following leaves cannot be distinguished from the previous ones. Each sheet gets you a little further. The image reference will show you what it should look like, and you should honestly repeat the attempt, as we are looking for any inconsistencies in the overall shape. There will also be a little in the middle between each leaf, forming the branch’s focus. Every time this is pulled, you’ll be ready for step 3!
Step 3 – The other part of the leaves
instructions for drawing a palm leaf Step 3 Effectively, this helps you work in the most effective method to lead the palm leaf! In this next step, you will draw another huge leaf segment. The following sheets will also be quite large but slightly narrower than the previous extension sheets. The focal branch will also be more visible; you can draw it using a few lines down the middle. Now it’s simple, and let’s continue to add images to the next level of support.
Step 4 – Next, add another large leaf slice
especially to draw a palm leaf level 4. We will add another huge segment of transitions to the leaf, drawing this fourth help stage. Now we will be approaching the end of the palm leaf, so all those leaves will become a little narrower the further away you go. As you can see in our model, the leaf will also start to lean a little to the right, which helps the leaf appear to have a little more weight. The next stage will be just one part of the drawing, and we’ll add any final tricks or additional ideas at this stage!
Step 5 – Count the last communications to your palm leaf design
instructions for drawing a palm leaf Step 5 You are now ready to add the last segment of this step to our AI