
Setting up your WiFi network extender with a Netgear Extender is a straightforward process aimed at enhancing the range and coverage of your wireless network. Utilizing a Netgear WiFi range extender allows you to amplify the effectiveness of your existing WiFi network. If you face recurring WiFi network issues, considering a Netgear Extender could be advantageous. However, it’s crucial to acquaint yourself with the steps for Netgear WiFi Extender Setup. In this guide, we will walk you through the essential steps for configuring a Netgear WiFi Extender.
Configuring Netgear Extender using the WPS Method
Setting up a Netgear extender through the WPS (Wi-Fi Protected Setup) method is a convenient approach to extend your wireless network coverage without the need for manual configuration.
Here’s a simplified process for setting up your Netgear Extender using the WPS method:
- Confirm that your primary router supports WPS.
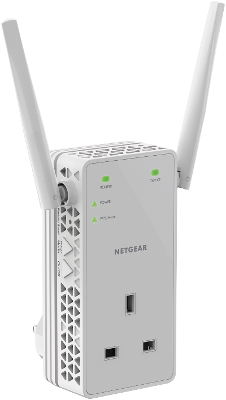
- Find and push the WPS button on your router. Connect the extender and wait for the power LED to light up. Hold down the extender’s WPS button until the WPS LED begins to flash. Push the WPS button on your router within a two-minute window.
- Upon successful connection, the WPS LED will turn solid green.
- If needed, relocate the extender to optimize coverage.
Note: If your router doesn’t support WPS or is not functional, you can opt for the web-based Netgear WiFi Extender Setup method instead.
Manual Configuration of Netgear Extender
Manually setting up the Netgear extender involves configuring its settings through a web browser.Here’s a simplified process for setting up your Netgear Extender via the manual method:
- Plug in the Netgear Extender.
- Link your device to the Wi-Fi network of the extender.
- Open a web browser and enter either mywifiext.net or type 192.168.1.250 in the address bar.
- Set up your extender by adhering to the on-screen instructions.
- After completing the Netgear WiFi Extender Setup, the extender will restart and connect to your main router’s network.
- Link your devices to the expanded network for enhanced coverage.
If any issues arise during the Netgear WiFi Extender Setup, please feel free to contact us via the provided toll-free number or live chat for assistance.
Netgear Extender Firmware Update
Updating the firmware on your Netgear wireless range extender is crucial for enhancing performance and security.
Here’s a simplified guide for the firmware update process:
- Connect your extender to a WiFi-enabled device.
- Open a web browser on your smartphone.
- Type 192.168.1.250 or mywifiext.net into the address bar.
- Log in using your credentials.
- Click on “Firmware Update.”
- Select the most recent firmware file from your PC.
- Select “Start Update.”
If you face any challenges during the update, reach out to our specialists via the provided contact options for assistance.
Resetting Your Netgear Extender
Resetting your Netgear extender entails returning it to its original factory settings, which will erase all personalized configurations and settings.
Here’s a step-by-step guide to resetting your Netgear extender to its default settings:
- Locate the reset button on the extender.
- Use a paperclip or similar object to press and hold the button for 10 seconds until the LED blinks.
- The extender will reboot to its default settings.
- Let go of the reset button when you see the LED flashing, and the device will restart with its initial configurations.
- Once it reboots, join the default Wi-Fi network using the standard password.
Note: Resetting erases all custom settings, including Wi-Fi name and password. You’ll need to reconfigure the extender using the Netgear Genie setup wizard or the web-based interface afterward.